
How do I upload images in the correct format?

Robert Oosterloo
Updated on · 6 min read
The large photos are the main reason a website becomes slow. With a few fixed sizes and a good file name, you can prevent that. In this article, you will read which format to use for each location, how to upload, and how to replace or delete an image without anything disappearing from your site.
In short
- Background of a section: 1920 pixels wide. Photo in a column: around 1200 pixels.
- Keep most photos under 300 KB.
- Photos as JPG or WebP, logos and icons as SVG or PNG.
- Upload via Media → Add Media File or directly from a block.
- Do not delete an image that is still in use as a background somewhere.
Which format do you choose?
Especially look at the width in pixels. A photo should never be wider than the place where it will appear, with some margin for sharp screens.
| Where does the photo go? | Width | File size |
|---|---|---|
| Background of a section (full screen width) | 1920 px | up to about 400 KB |
| Photo in a column, next to text | 1200 px | up to about 300 KB |
| Card, gallery, or slider | 800 to 1200 px | up to about 200 KB |
| Logo in a logo row | 400 x 200 px (same canvas for all logos) | as small as possible |
Background of a section: 1920 px
A section background spans the entire width of the screen. 1920 pixels wide is sufficient for almost any screen. Important: a section always uses the photo you upload at full size. WordPress does create smaller versions, but the background does not use them. A photo of 6000 pixels will also be loaded as 6000 pixels.
Photo in a column: 1200 px
If the photo is in a column next to text, it will be at most about 700 pixels wide on a large screen. With 1200 pixels, it will also look good on sharp screens.
Card and gallery: 800 to 1200 px
In a card, gallery, or slider, photos are smaller. 800 pixels is often enough. If the gallery opens a photo large (the lightbox), then take 1200 pixels.
Nog geen website op leflite?
Wij bouwen hem samen met jou. Daarna pas je alles zelf aan, precies zoals in dit artikel.
- Online binnen een week
- Hosting, SSL en back-ups inbegrepen
- Vanaf €49,95 per maand
JPG, PNG, WebP, or SVG?
- JPG: for photos. Small files, good quality.
- WebP: a more modern format for photos, often even smaller than JPG with the same quality. WordPress can display it easily.
- PNG: for images with a transparent background, such as a logo or a screenshot. PNG is far too heavy for photos.
- SVG: for logos and icons. Remains sharp at any size and is very small. Your website accepts SVG files.
Resize before you upload
Resize and compress your photos before uploading them. This can be done with free tools, for example:
- Squoosh (squoosh.app): in your browser, resize and convert to WebP or JPG.
- TinyPNG (tinypng.com): compresses JPG, PNG, and WebP without visible difference.
- On your computer: Photos (Windows) or Preview (Mac) can also save a photo smaller.
A good file name
Give the file a name that describes what it contains, using lowercase letters and hyphens: kitchen-renovation-dokkum.jpg instead of IMG_4821.JPG. Google reads the file name, and you will find the photo faster later in the media library.
Step 1: Open the upload screen
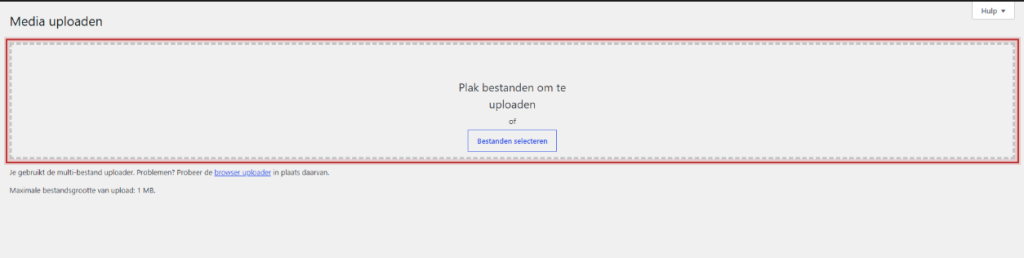
Go to Media → Add Media File in the left menu. You can also upload from a block: click on the image field in the block and select the Upload Files tab.
Step 2: Drag your photos in
Drag one or more photos into the box, or click on Select Files. Below the box, you will see the maximum upload file size. This depends on the hosting. If your photo is larger, resize it first.
Step 3: Check the details and fill in the alt text
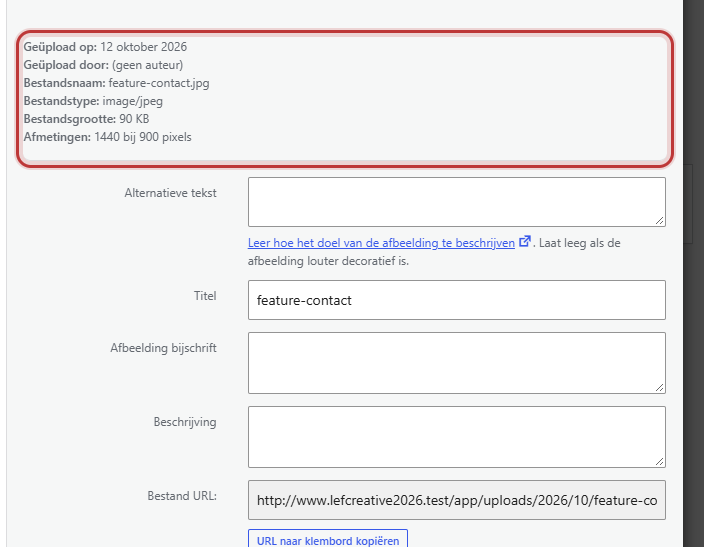
Click on the photo in the library. On the right in Attachment Details, you will see the File Size and the Dimensions. If a photo is larger than in the table above, replace it with a smaller version. Also fill in the Alternative Text here: see filling in good alt text.
The Image size in a block
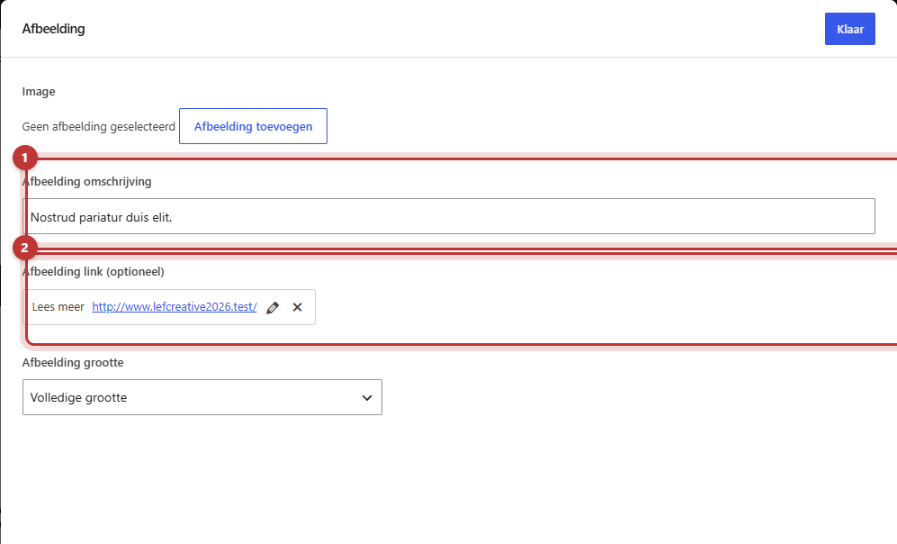
WordPress automatically creates smaller versions of your photo with each upload. In the blocks Image, Image slider, and Before & after slider, you choose at Image size which version the visitor receives. In the Gallery, that field is called Preview image size.
- Full size (default): the photo as you uploaded it.
- Large: maximum 1024 pixels. Perfect for a photo in a column.
- Medium large: 768 pixels wide. Good for galleries and sliders with multiple photos next to each other.
- Medium and Thumbnail: small. Thumbnail is cropped square.
If you already upload in the right size, you can leave Full size as is.
Replacing or deleting an image
You delete an image in the media library: click on the photo and choose Delete Permanently at the bottom. That is truly permanent.
Replacing a photo with a new version does not happen with one click. Upload the new photo and select it again in each block where the old one was. Only then delete the old one.
Note: if you delete an image that is used as a background of a section, that background will disappear. Also, a block where the photo was will then show nothing. WordPress will not warn you about this. So check first where the photo is located.
Having trouble?
- The upload fails or gets stuck. The file is likely larger than the maximum upload size. Resize the photo and try again.
- My photo looks blurry. The selected Image size is too small for the location. Choose a larger version or Full size.
- My background photo loads slowly. A section always uses the full photo. Upload it again at 1920 pixels wide and select it again in the section. See a photo as a background of a section.
- A photo appears rotated. Rotate it on your computer, save it again, and upload it again.
- My website has become slow. Read why your website is slow and what you can do about it.
Can’t figure it out? Contact us.
Frequently asked questions
Keep most photos under 300 KB and no wider than 1920 pixels. Only a full-screen background can be slightly heavier.
Not by default. Upload the new photo and select it again in the blocks and sections where the old one was.
Share this article
Robert Oosterloo
Robert Oosterloo is eigenaar en UX/UI-designer van Lef Creative in Kollum. Hij ontwerpt websites, webshops en software voor ondernemers in Noord-Nederland.
Read also
Setting up a slider
A video as a background
A photo as the background of a section






Want a website like this?
Here you can read how easy it is to maintain a leflite site yourself. Want one too? We will think along with you, no strings attached.
Prefer direct contact? Call Robert at 06 35 66 47 73 or send a WhatsApp.