
How do I compare two photos with the before-and-after slider?

Robert Oosterloo
Updated on · 3 min read
A renovated kitchen, a revamped garden, a treatment in the salon: with the Before & After slider, you can see the difference in one image. The visitor drags a slider over the photo and sees the situation before on the left and after on the right. This is how you set it up.
In short
- Add the block Before & After slider in a column.
- Choose the Before image and the After image. Without both, the block shows nothing.
- Optional: a Before label and After label.
- Use two photos with the same width and height, taken from the same viewpoint.
Step 1: Add the Before & After slider block
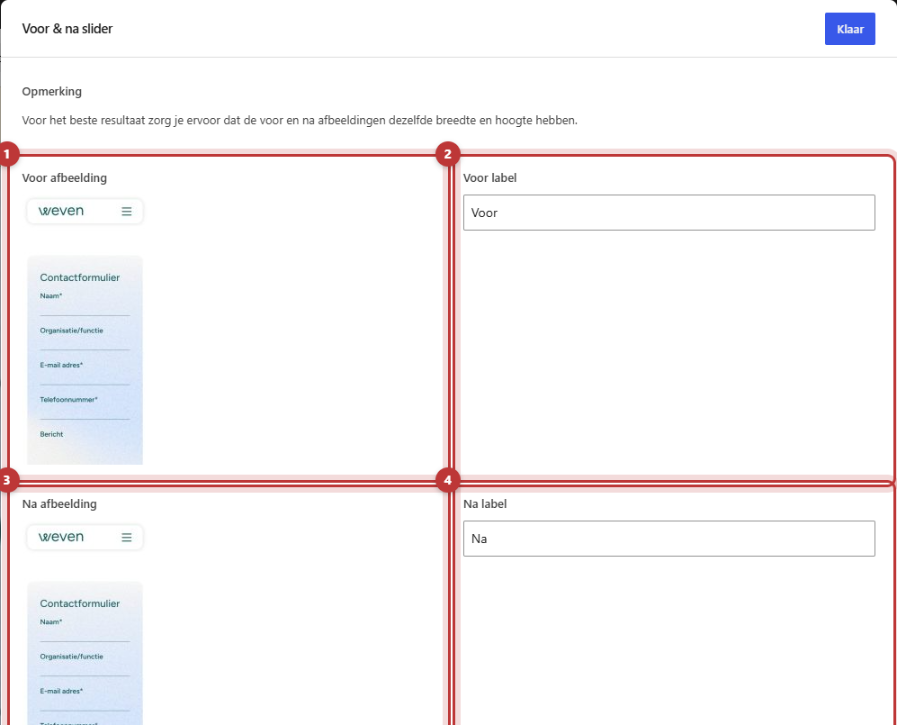
Click on the plus sign in a column, search for before or slider and choose Before & After slider. At the top of the settings, there is a note: “For the best results, make sure the before and after images have the same width and height.” Take that seriously, see the tips below.
Step 2: Choose the before and after image
Select the photo of the old situation for Before image and the photo of the result for After image. Both are required: with one photo, the block shows nothing.
Nog geen website op leflite?
Wij bouwen hem samen met jou. Daarna pas je alles zelf aan, precies zoals in dit artikel.
- Online binnen een week
- Hosting, SSL en back-ups inbegrepen
- Vanaf €49,95 per maand

Step 3: Fill in the labels
For Before label and After label, type a short word that will appear in the corner of the photo, for example, “Before” and “After”, or “2019” and “2026”. The before label is at the top left, the after label is at the top right. Leave them blank if you do not want labels.
Step 4: Choose the Image size
For Image size, choose which version of the photos the block will use. In a wide column, Large or Full size (with photos around 1200 to 1920 pixels wide) looks nice and sharp.
This is how it works for your visitor
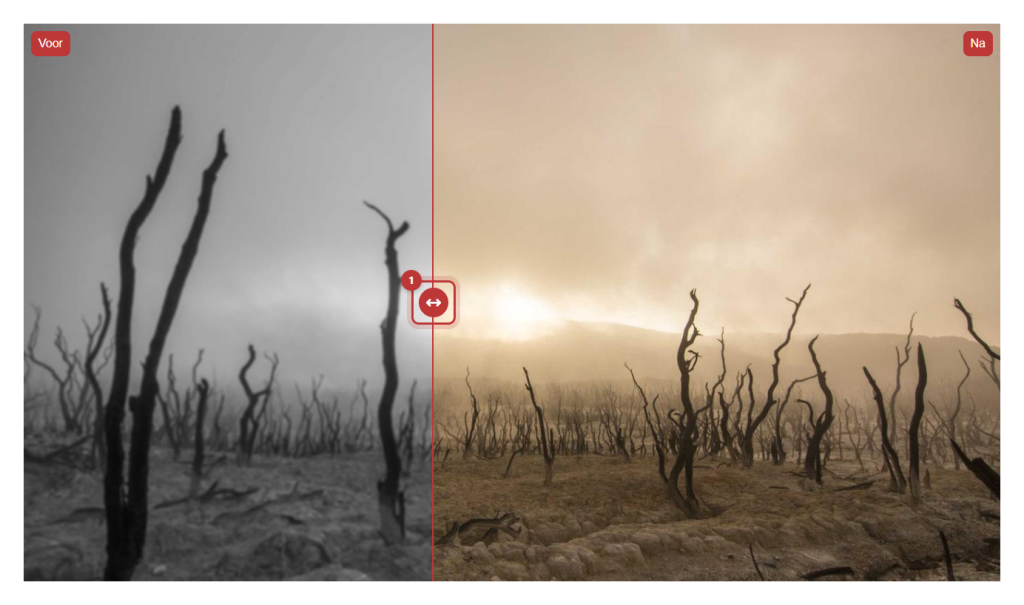
The slider starts in the middle. The visitor drags the round button left or right, or clicks on a spot in the photo: the dividing line jumps there. On a phone, dragging is done with a finger.
Tips for good photos
- Same viewpoint: take the after photo from exactly the same spot and height as the before photo. Mark the spot, or use a tripod.
- Same size: crop both photos to the same width and height, for example, 1600 x 900 pixels. The height of the slider follows the after photo. If the before photo has a different aspect ratio, the image will not align correctly.
- Same lighting: photograph in similar daylight so that the difference truly reflects the result.
- Light file: reduce the photos before you upload them, see uploading images in the correct format.
Tip: do you have many projects with a before and after photo? Then set up a before-and-after slider for each project, or show the results in a photo gallery and choose one project for the slider.
Having trouble?
- I see nothing on the page. Choose both a Before image and an After image. With one photo, the block shows nothing.
- The photos are jumping or do not fit. The photos have different dimensions. Crop them to exactly the same width and height and upload them again.
- The photos are blurry. Choose a larger Image size.
- Before and after are reversed. Swap the photos in the fields Before image and After image.
Read more about images on your website in everything about images and video. Can’t figure it out? Contact us.
Share this article
Robert Oosterloo
Robert Oosterloo is eigenaar en UX/UI-designer van Lef Creative in Kollum. Hij ontwerpt websites, webshops en software voor ondernemers in Noord-Nederland.
Read also
Setting up a slider
A video as a background
A photo as the background of a section






Want a website like this?
Here you can read how easy it is to maintain a leflite site yourself. Want one too? We will think along with you, no strings attached.
Prefer direct contact? Call Robert at 06 35 66 47 73 or send a WhatsApp.